Users added to your organization can view live views, query running clusters, and deploy new Pixie clusters.
Open the Live UI and navigate to the Users tab on the Admin page (/admin/users).
Click the “+ Invite Users” button in the top right corner and follow the directions in the modal popup box.
Note that Pixie Organizations managed by Google Workspaces may only invite other members of that Google Workspace. Pixie Google Workspace Organizations have the following notification at the top of the Users tab (/admin/users):
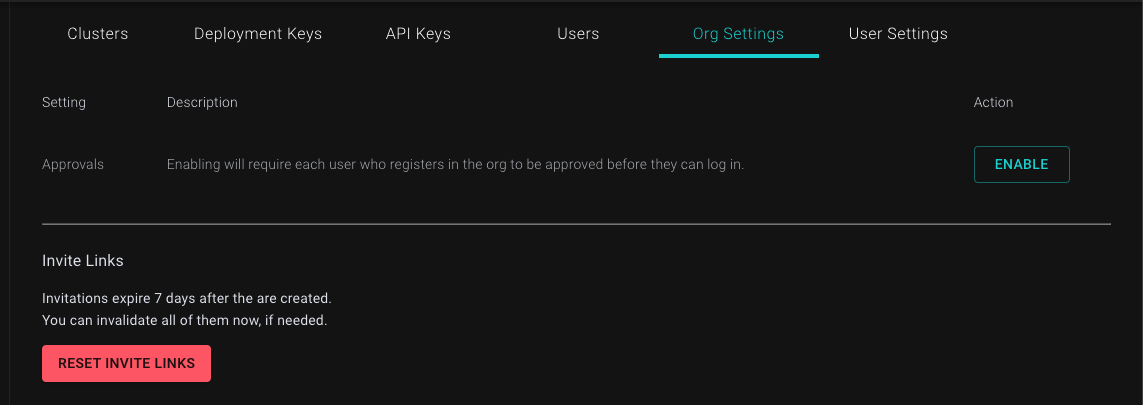
Enable Approvals for New Users
For an additional layer of control over who joins your organization, enable User Approvals. Once enabled, every user who joins your org must be manually approved before they are able to use Pixie.
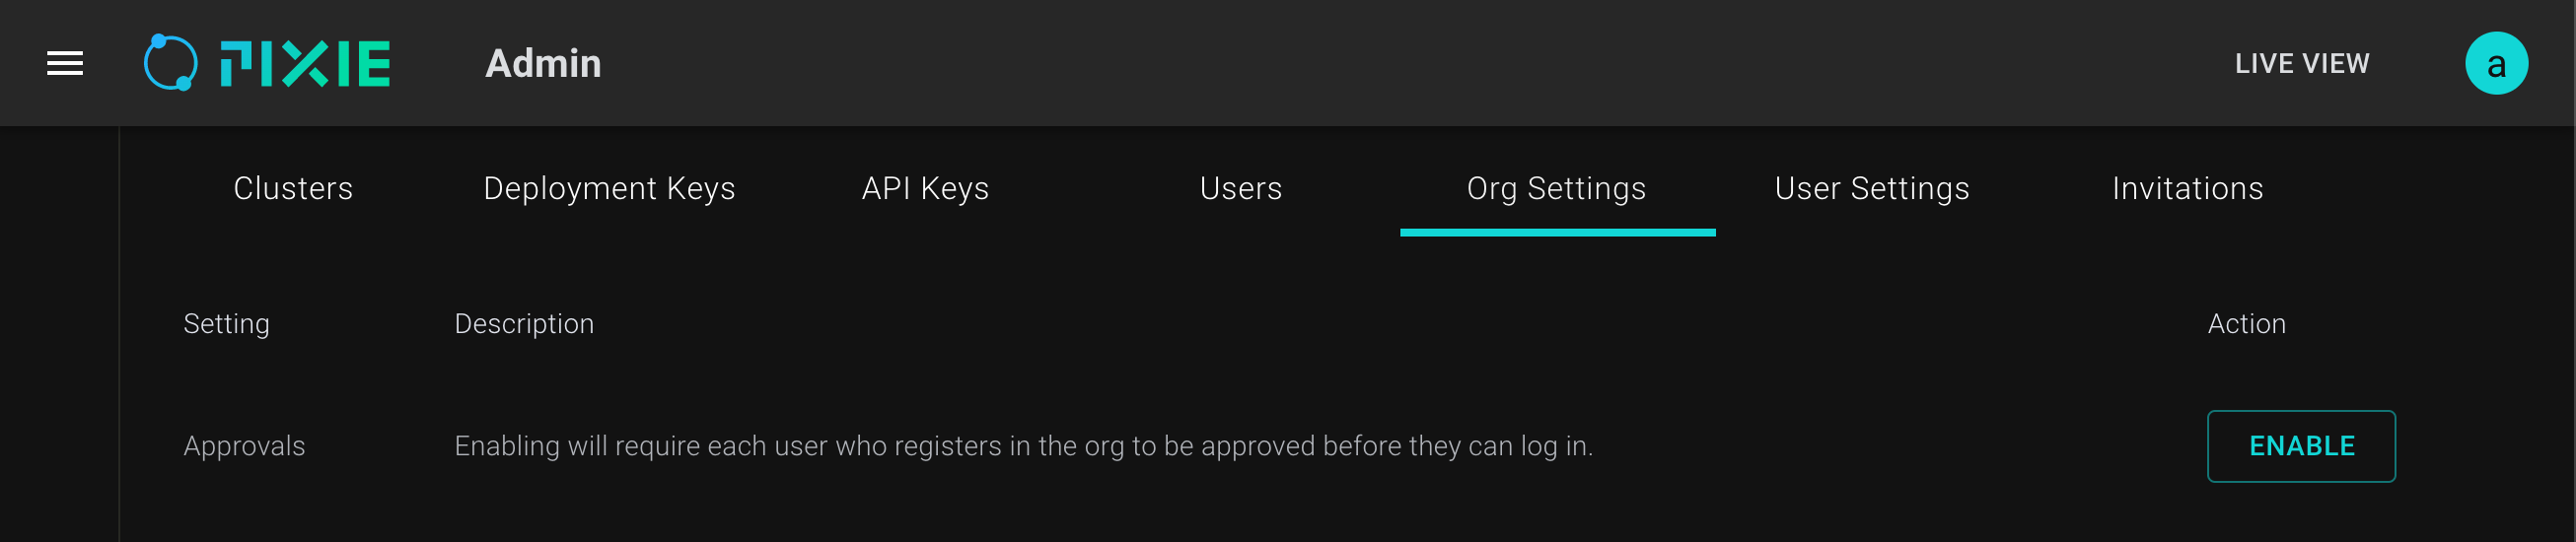
Open the Live UI and navigate to the Org Settings tab on the Admin page (/admin/users).
Click “Enable” on the approval setting to enable Approvals. Note that if the button says “Disable”, this means User Approvals has already been enabled for your organization.
Manually approve new users under the Users tab (/admin/users). Once User Approvals is enabled, any new users that join your org will join in a disabled state. Click “Approve” on the appropriate user to allow that user complete access to your organization within Pixie.
Invalidate Invite Links
Invite links are valid for 7 days from the time of creation and will expire automatically at the end of the 7 day period. If you would like to invalidate invite links before the 7 day period is over, you can do so on the Orgs page.
When you reset invite links, ALL existing invite links for your organization will be invalidated.
Open the Live UI and navigate to the Org Settings tab on the Admin page (/admin/users).
Click the red "Reset Invite Links" button. This will pop open a modal to confirm that you would like to reset all existing invite links for your org.
Click “Reset Invite Links” in the modal to confirm and invalidate all existing invite links.
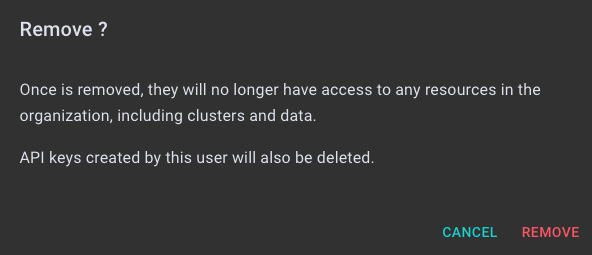
Remove Users
Open the Live UI and navigate to the Users tab on the Admin page (/admin/users).
Click the "Remove" button next to the desired user.
Accept the prompt confirming the removal.
Once a user is removed, they will be automatically logged out from any active UI sessions and will be unable to query Pixie resources.
Hydra / Kratos
Pixie instances using Hydra / Kratos as an identity provider can:
Users added to your organization can view live views, query running clusters, and deploy new Pixie clusters.
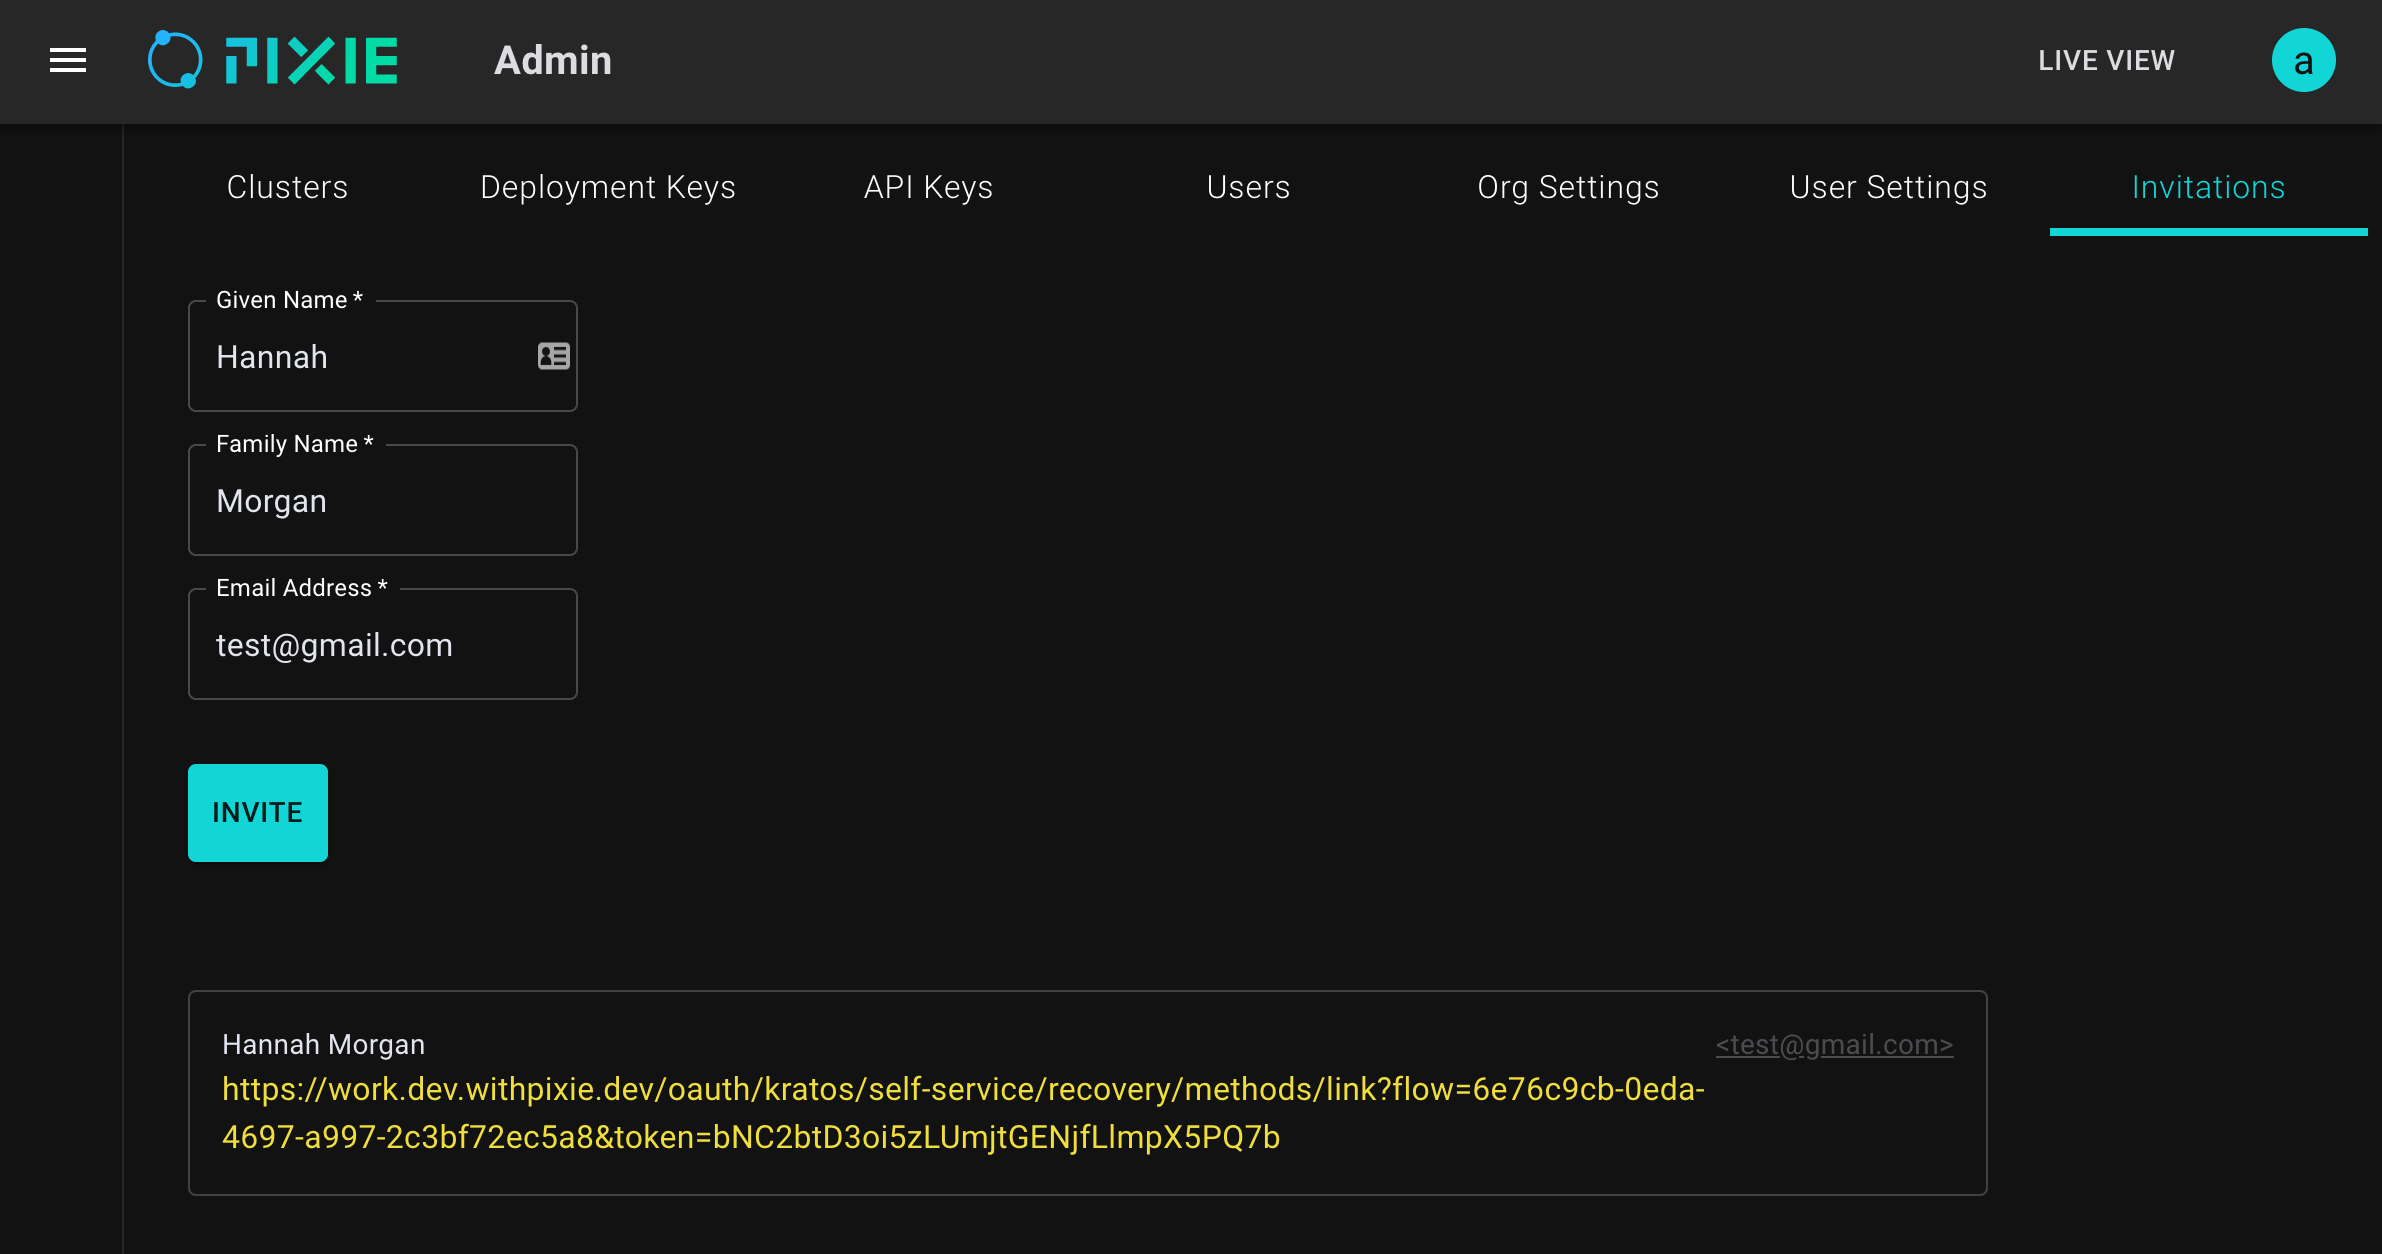
Open the Live UI and navigate to the Invitations tab on the Admin page (/admin/invite).
Fill out the necessary information, then click the "Invite" button.
Copy and share the created link with your teammate. Note that this link expires after 1 hour and cannot be recreated for the expired email address.
Enable Approvals for New Users
Once enabled, every user who joins your org via an Invite Link must be manually approved before they are able to use Pixie.
Open the Live UI and navigate to the Org Settings tab on the Admin page (/admin/org).
Click “Enable” on the Approvals setting to enable Approvals. Note that if the button says “Disable”, this means User Approvals has already been enabled for your organization.
Manually approve new users under the Users tab (/admin/users). Once User Approvals is enabled, any new users that join your org will join in a disabled state. Click “Approve” on the appropriate user to allow that user complete access to your organization within Pixie.