You can interact with the Pixie platform using the web-based Live UI, CLI or API.
Scripts run in the Live UI offers rich visualizations that are not available with the CLI or API. For this reason, we recommend that developers who are new to Pixie begin by using the Live UI.
Setup
Pixie needs to be installed on your Kubernetes cluster. If it is not already installed, please consult our install guides.
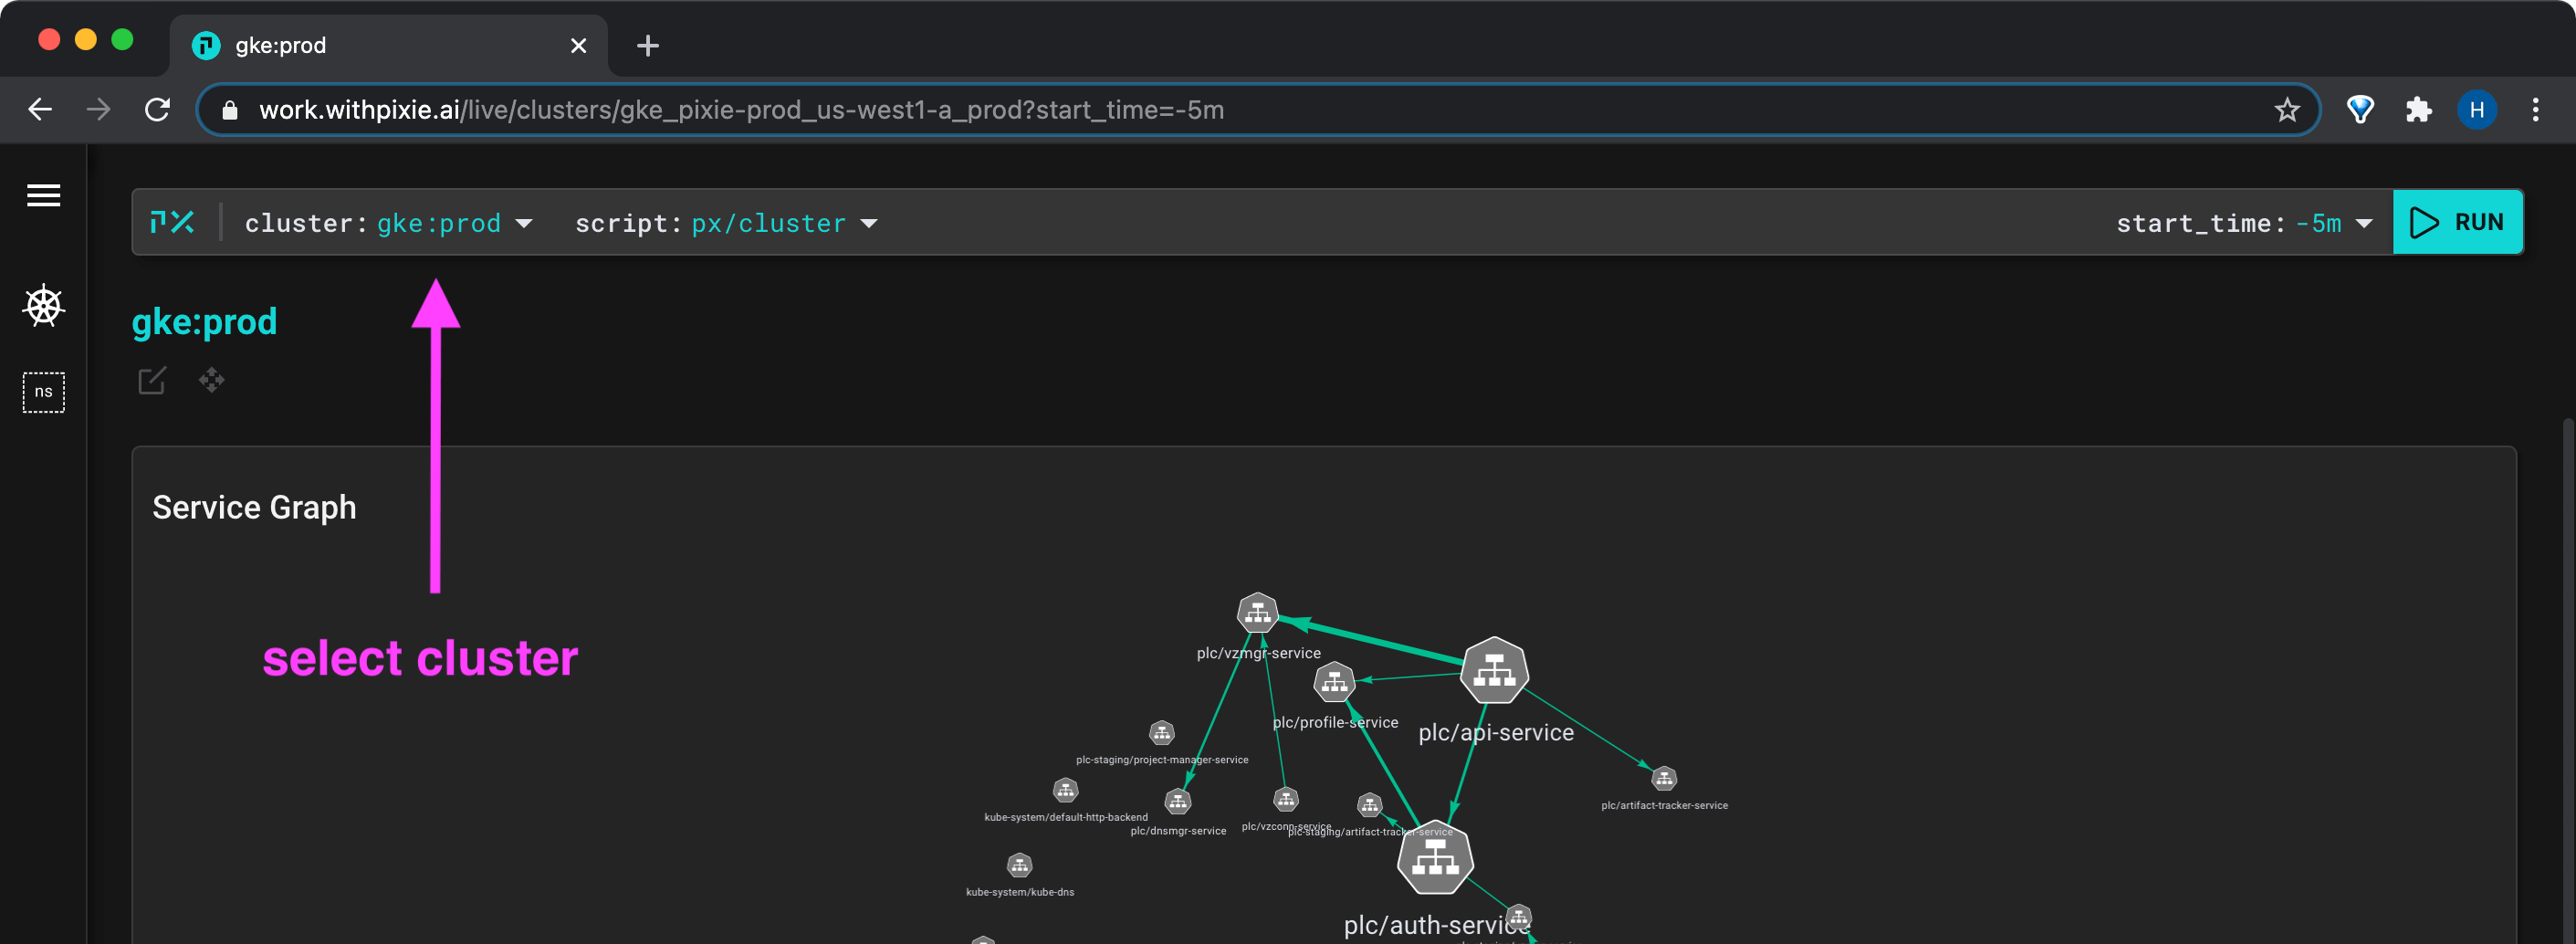
Select your cluster using the cluster drop-down menu.
Selecting your cluster in the Live UI.
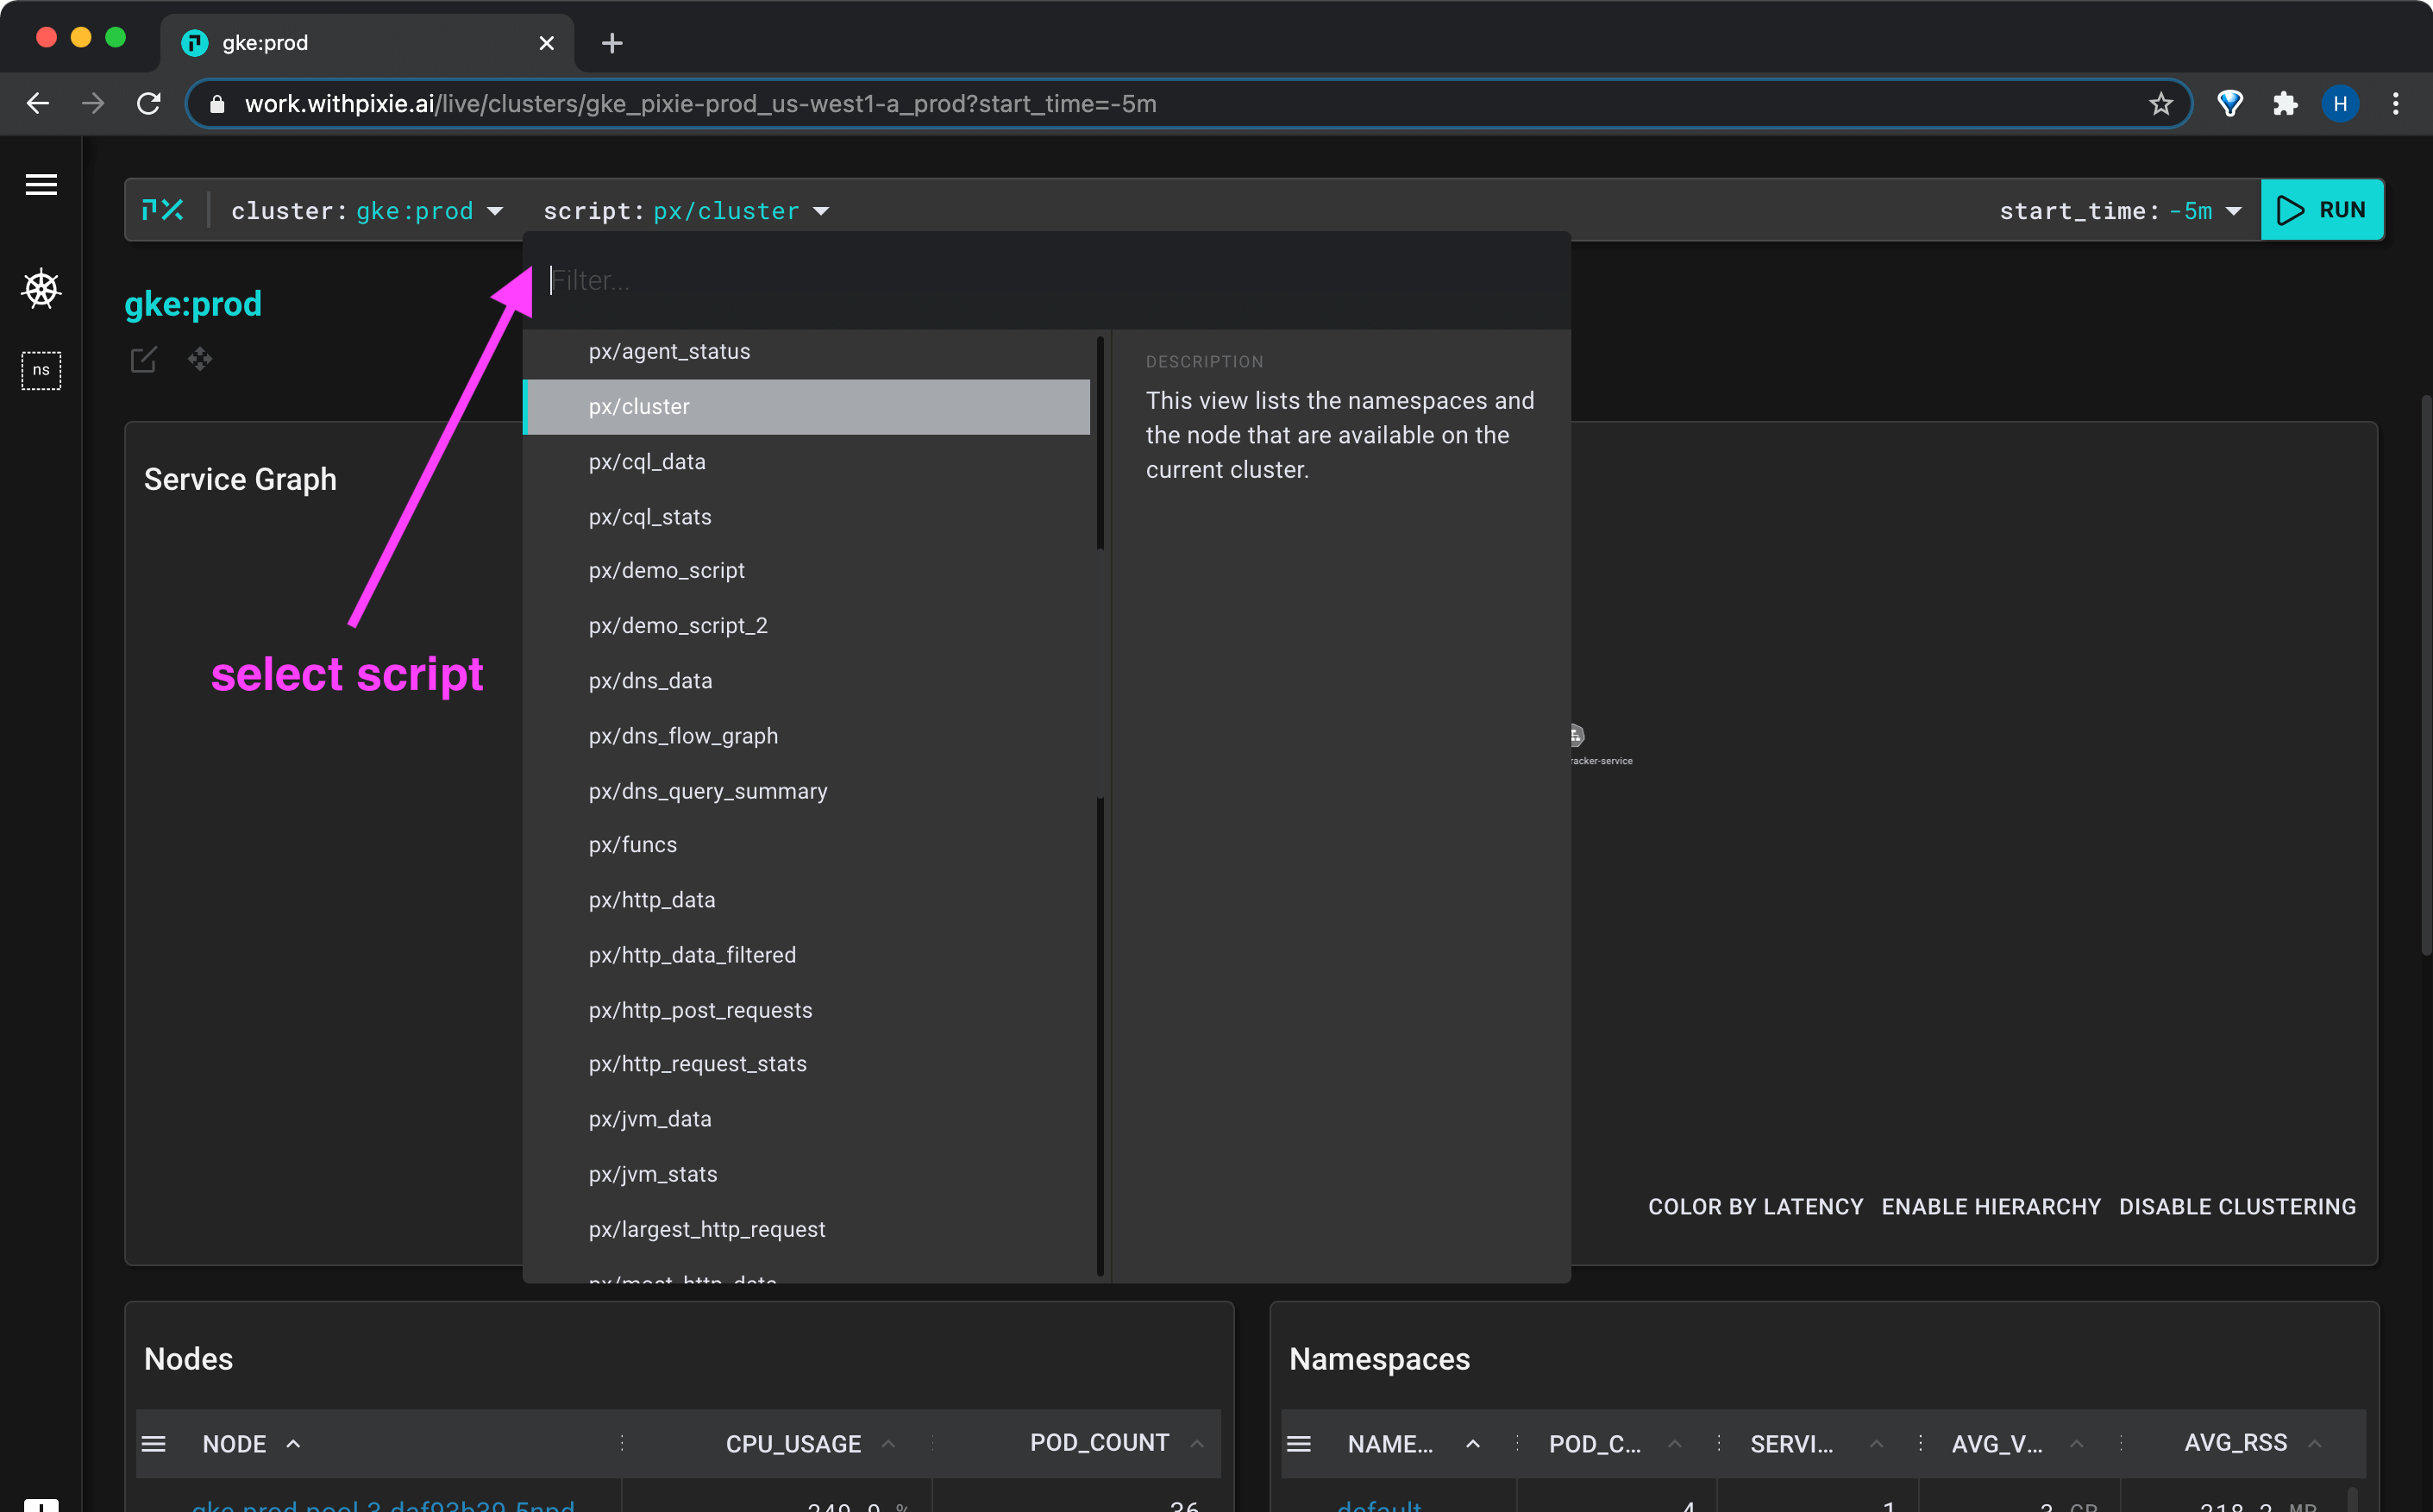
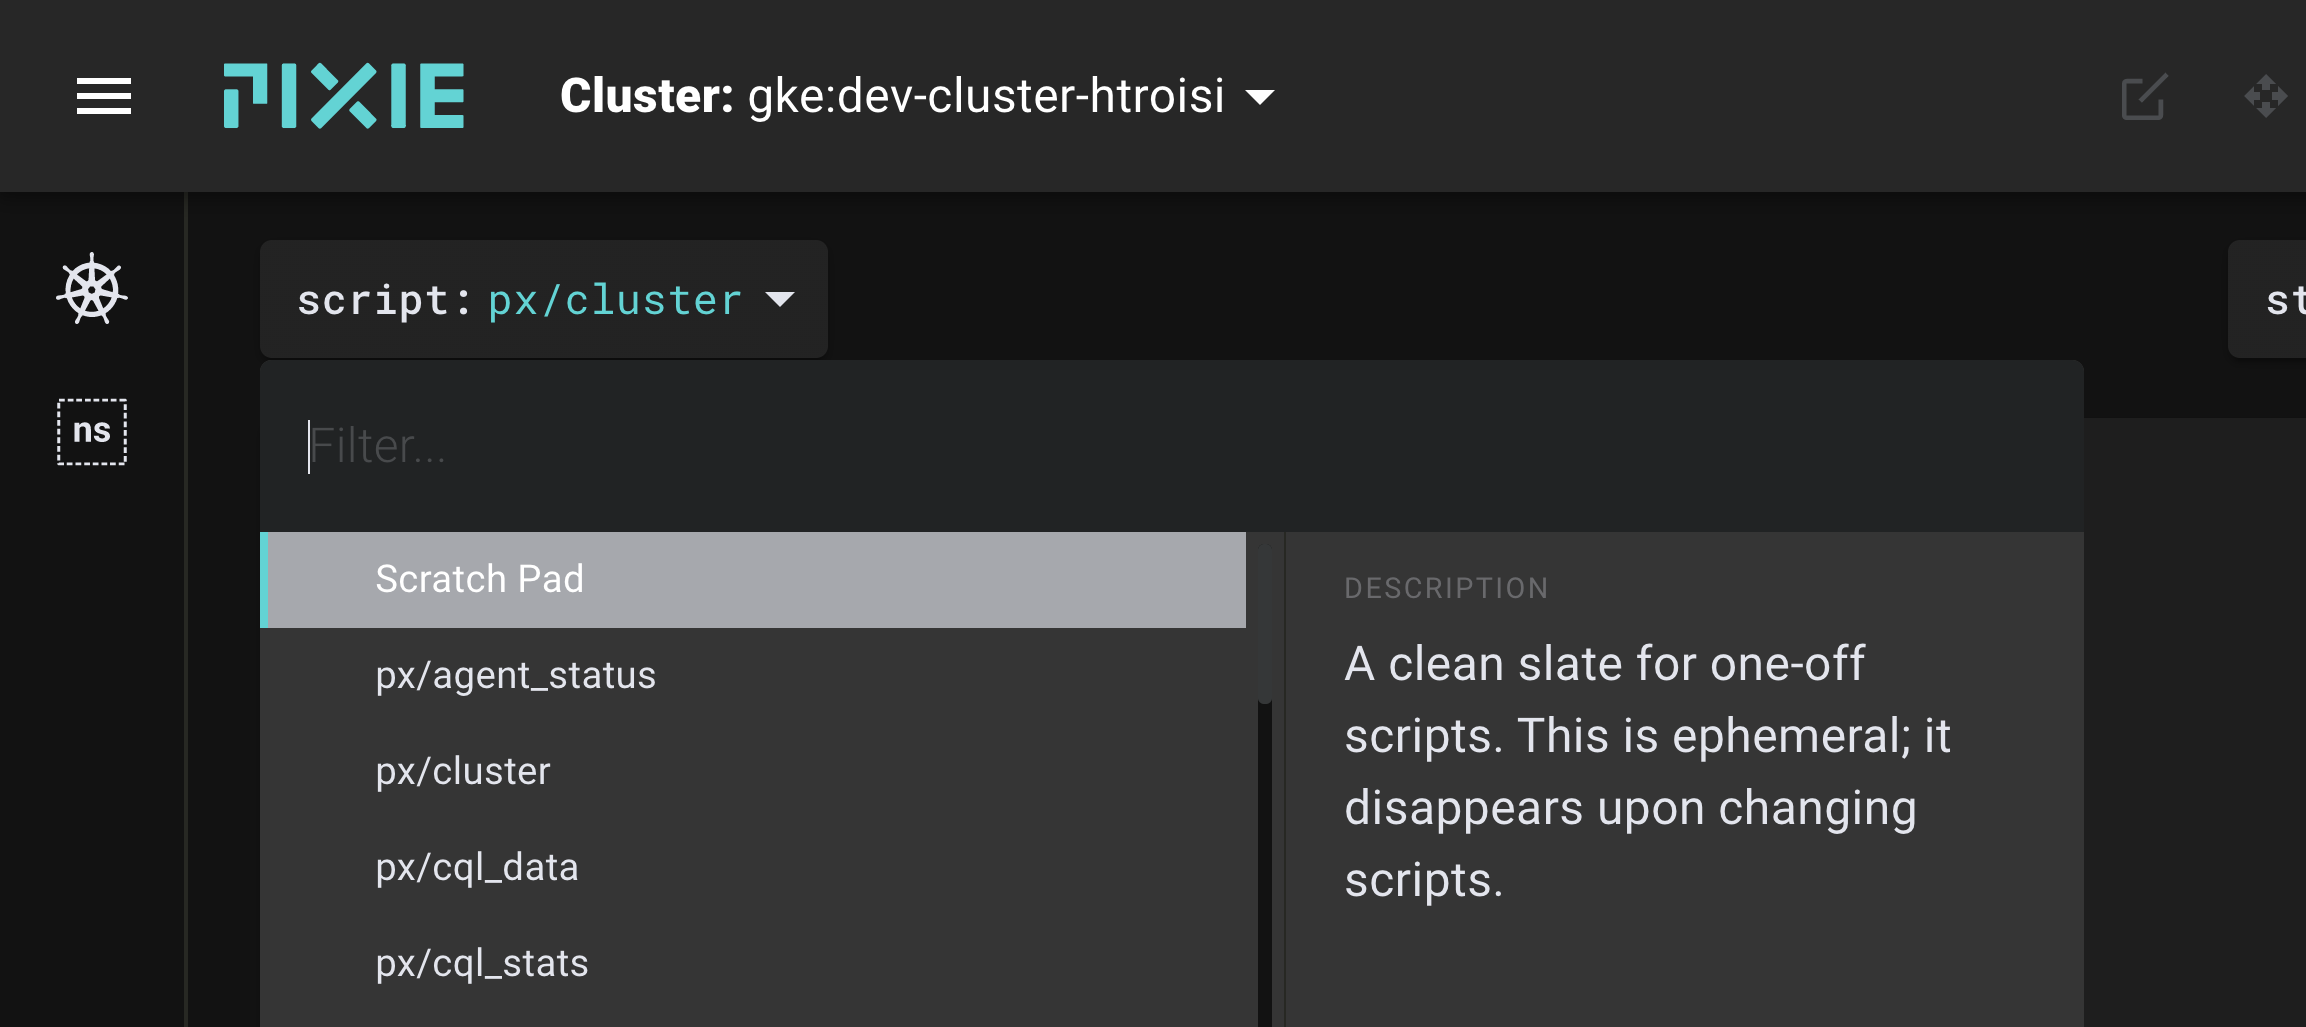
Select the px/cluster script from the script drop-down menu. The right-half of this menu displays a description of the selected script.
Selecting your script in Live UI.
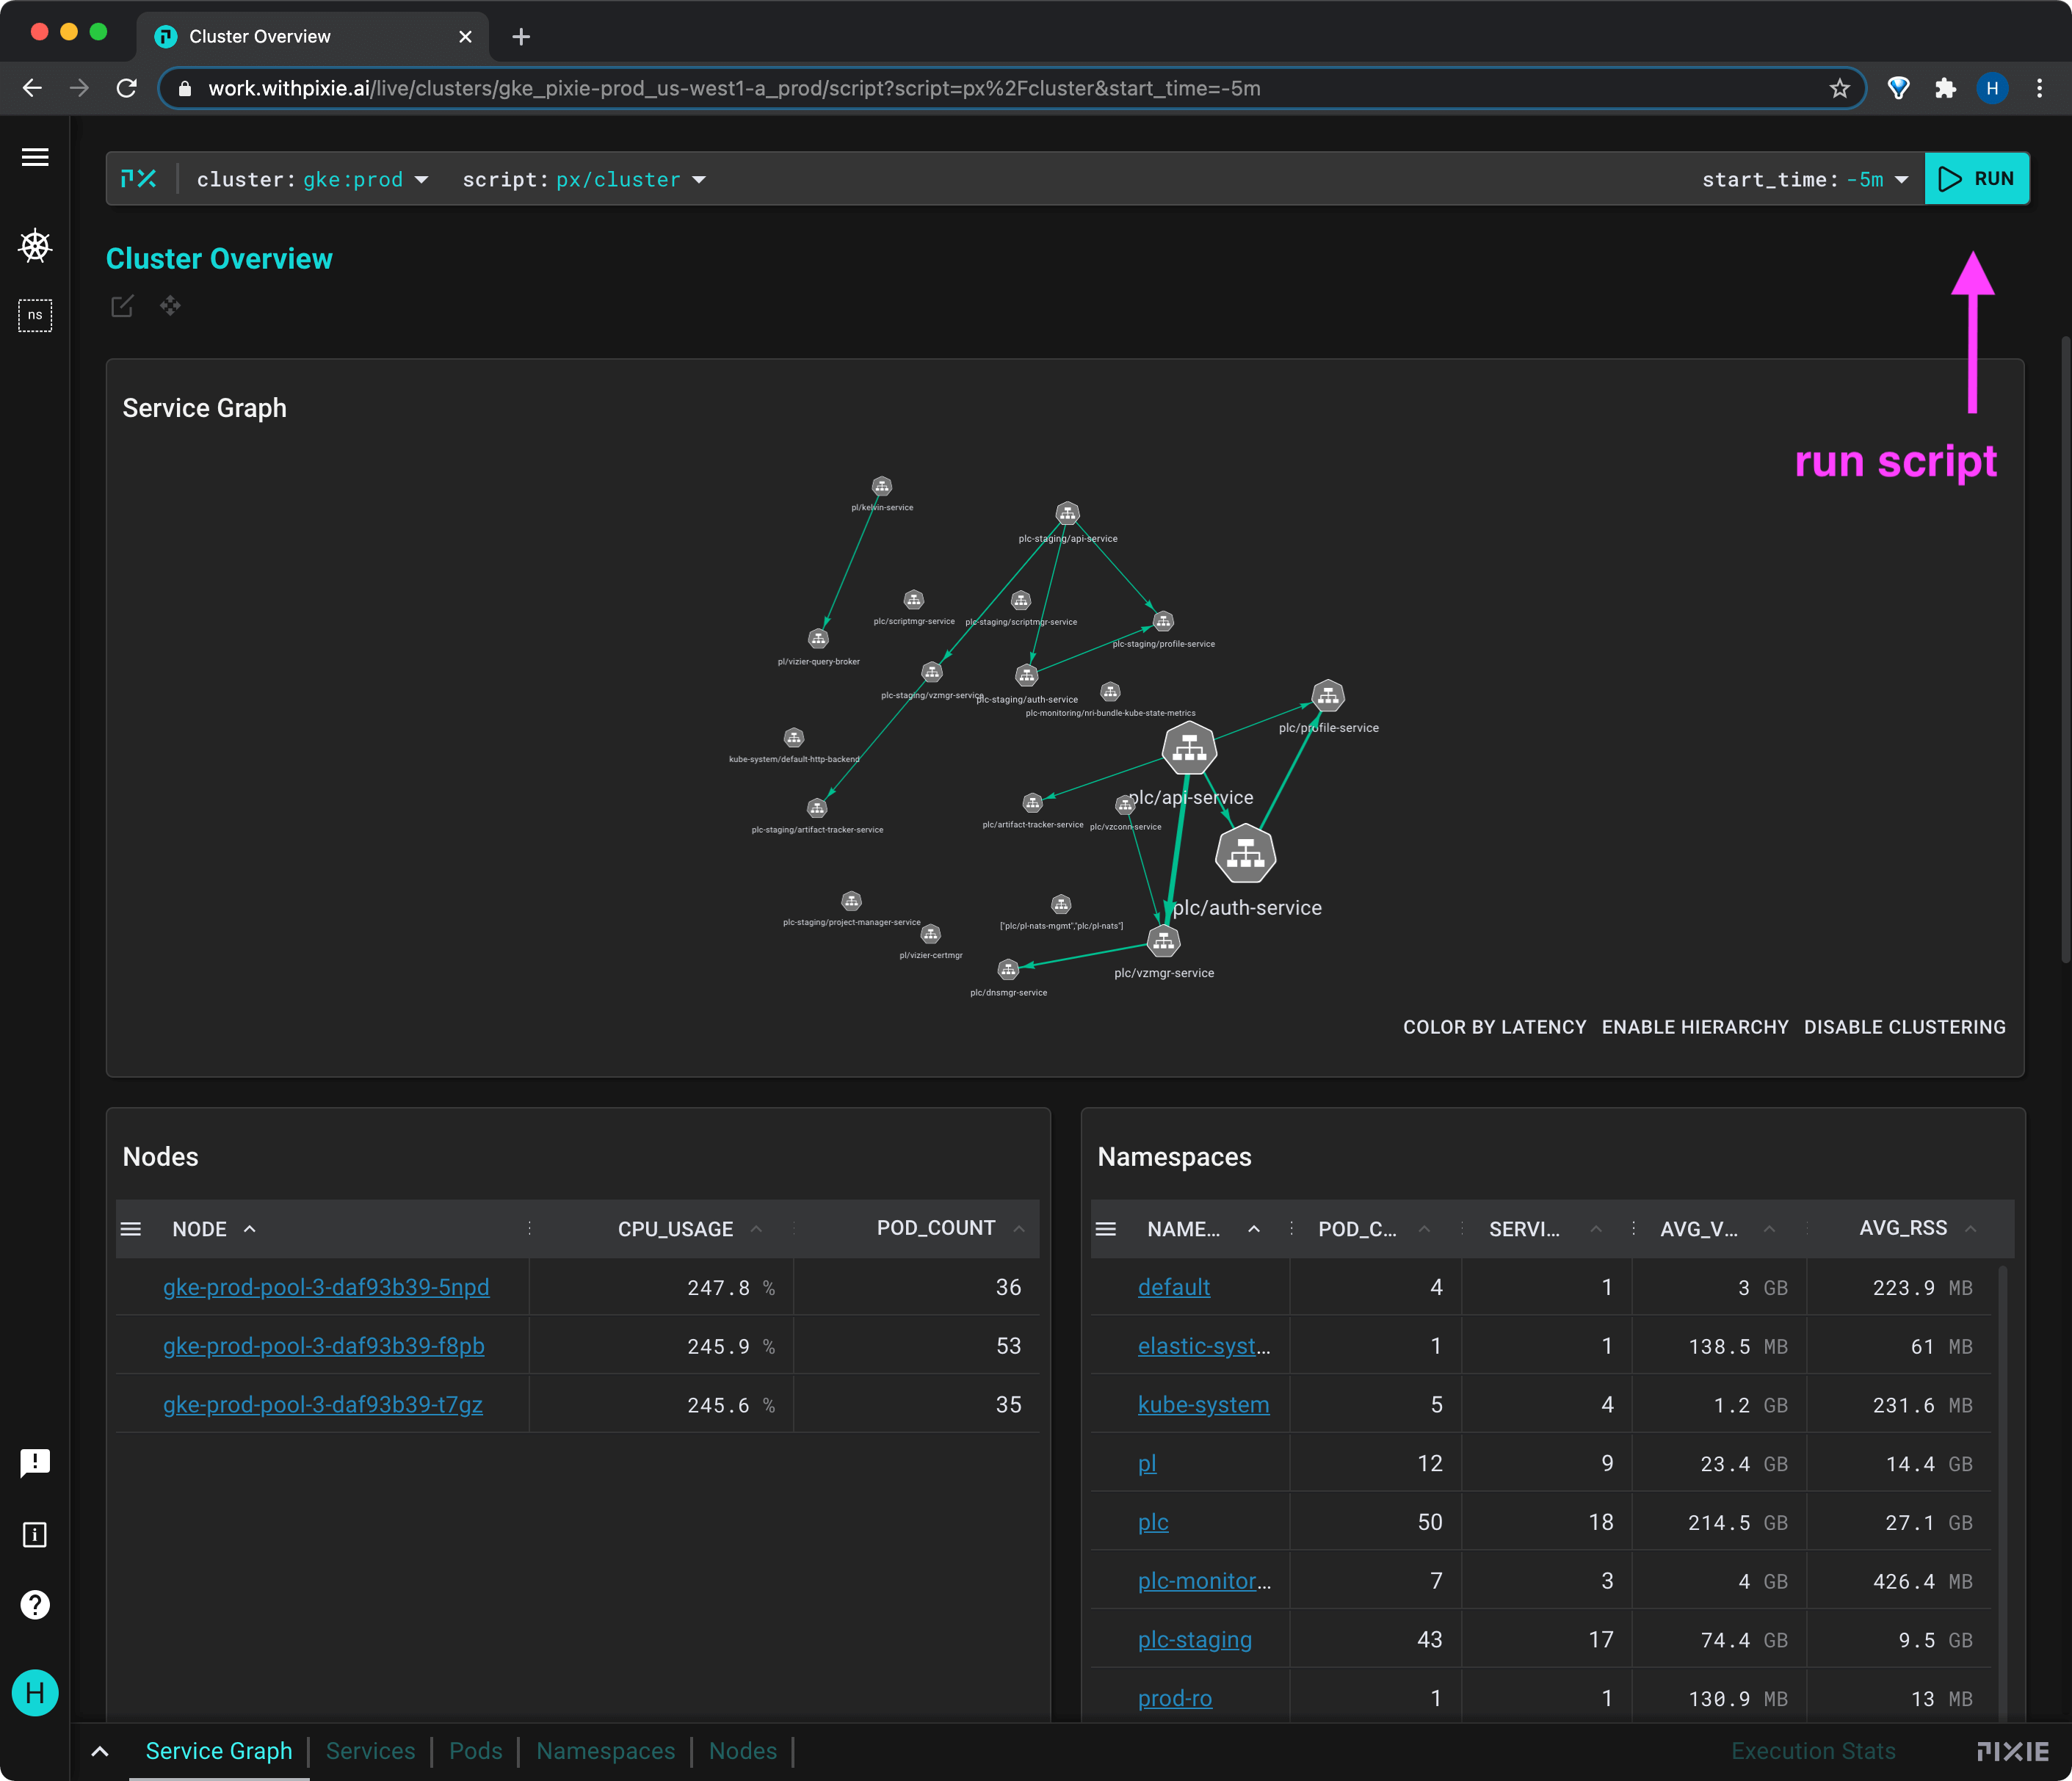
Run the script using the RUN button in the top right. The px/cluster script lists all of the namespaces, services, nodes and pods on your cluster. After running the script, you should see something similar to the following.
Output of the px/cluster script.
Tables in the script output can be sorted by column by clicking on the column title. Rows in the table can be expanded by clicking on the row.
Editing Script Arguments
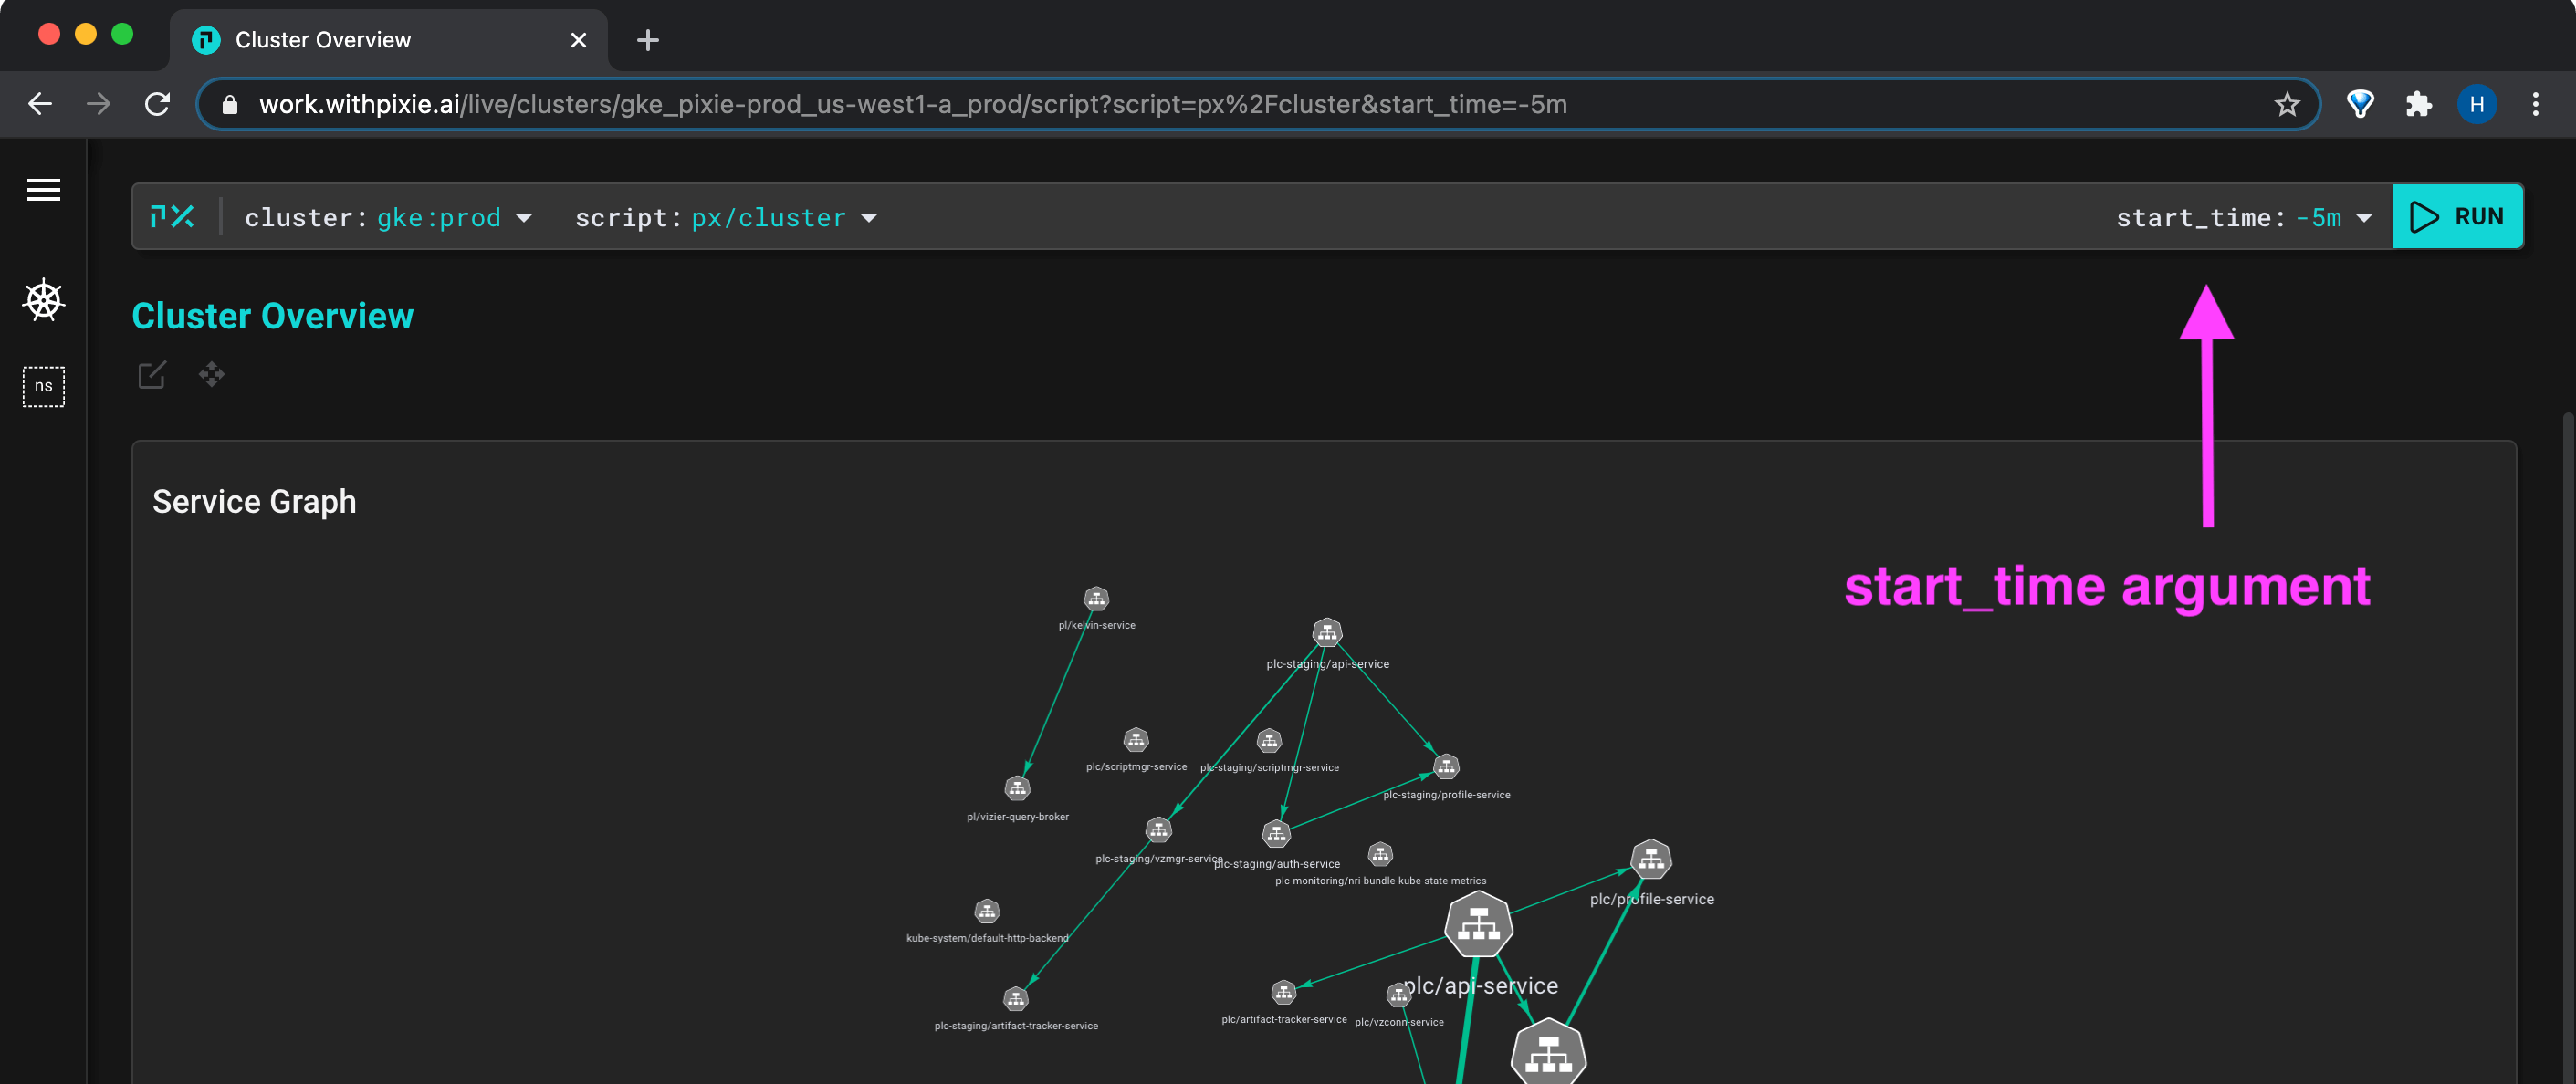
Scripts often take arguments, which will appear next to the cluster and script drop-down menus. This script takes an argument for start_time.
Modify the start_time to set it to -10m and re-run the script using the RUN button.
Modify the start_time.
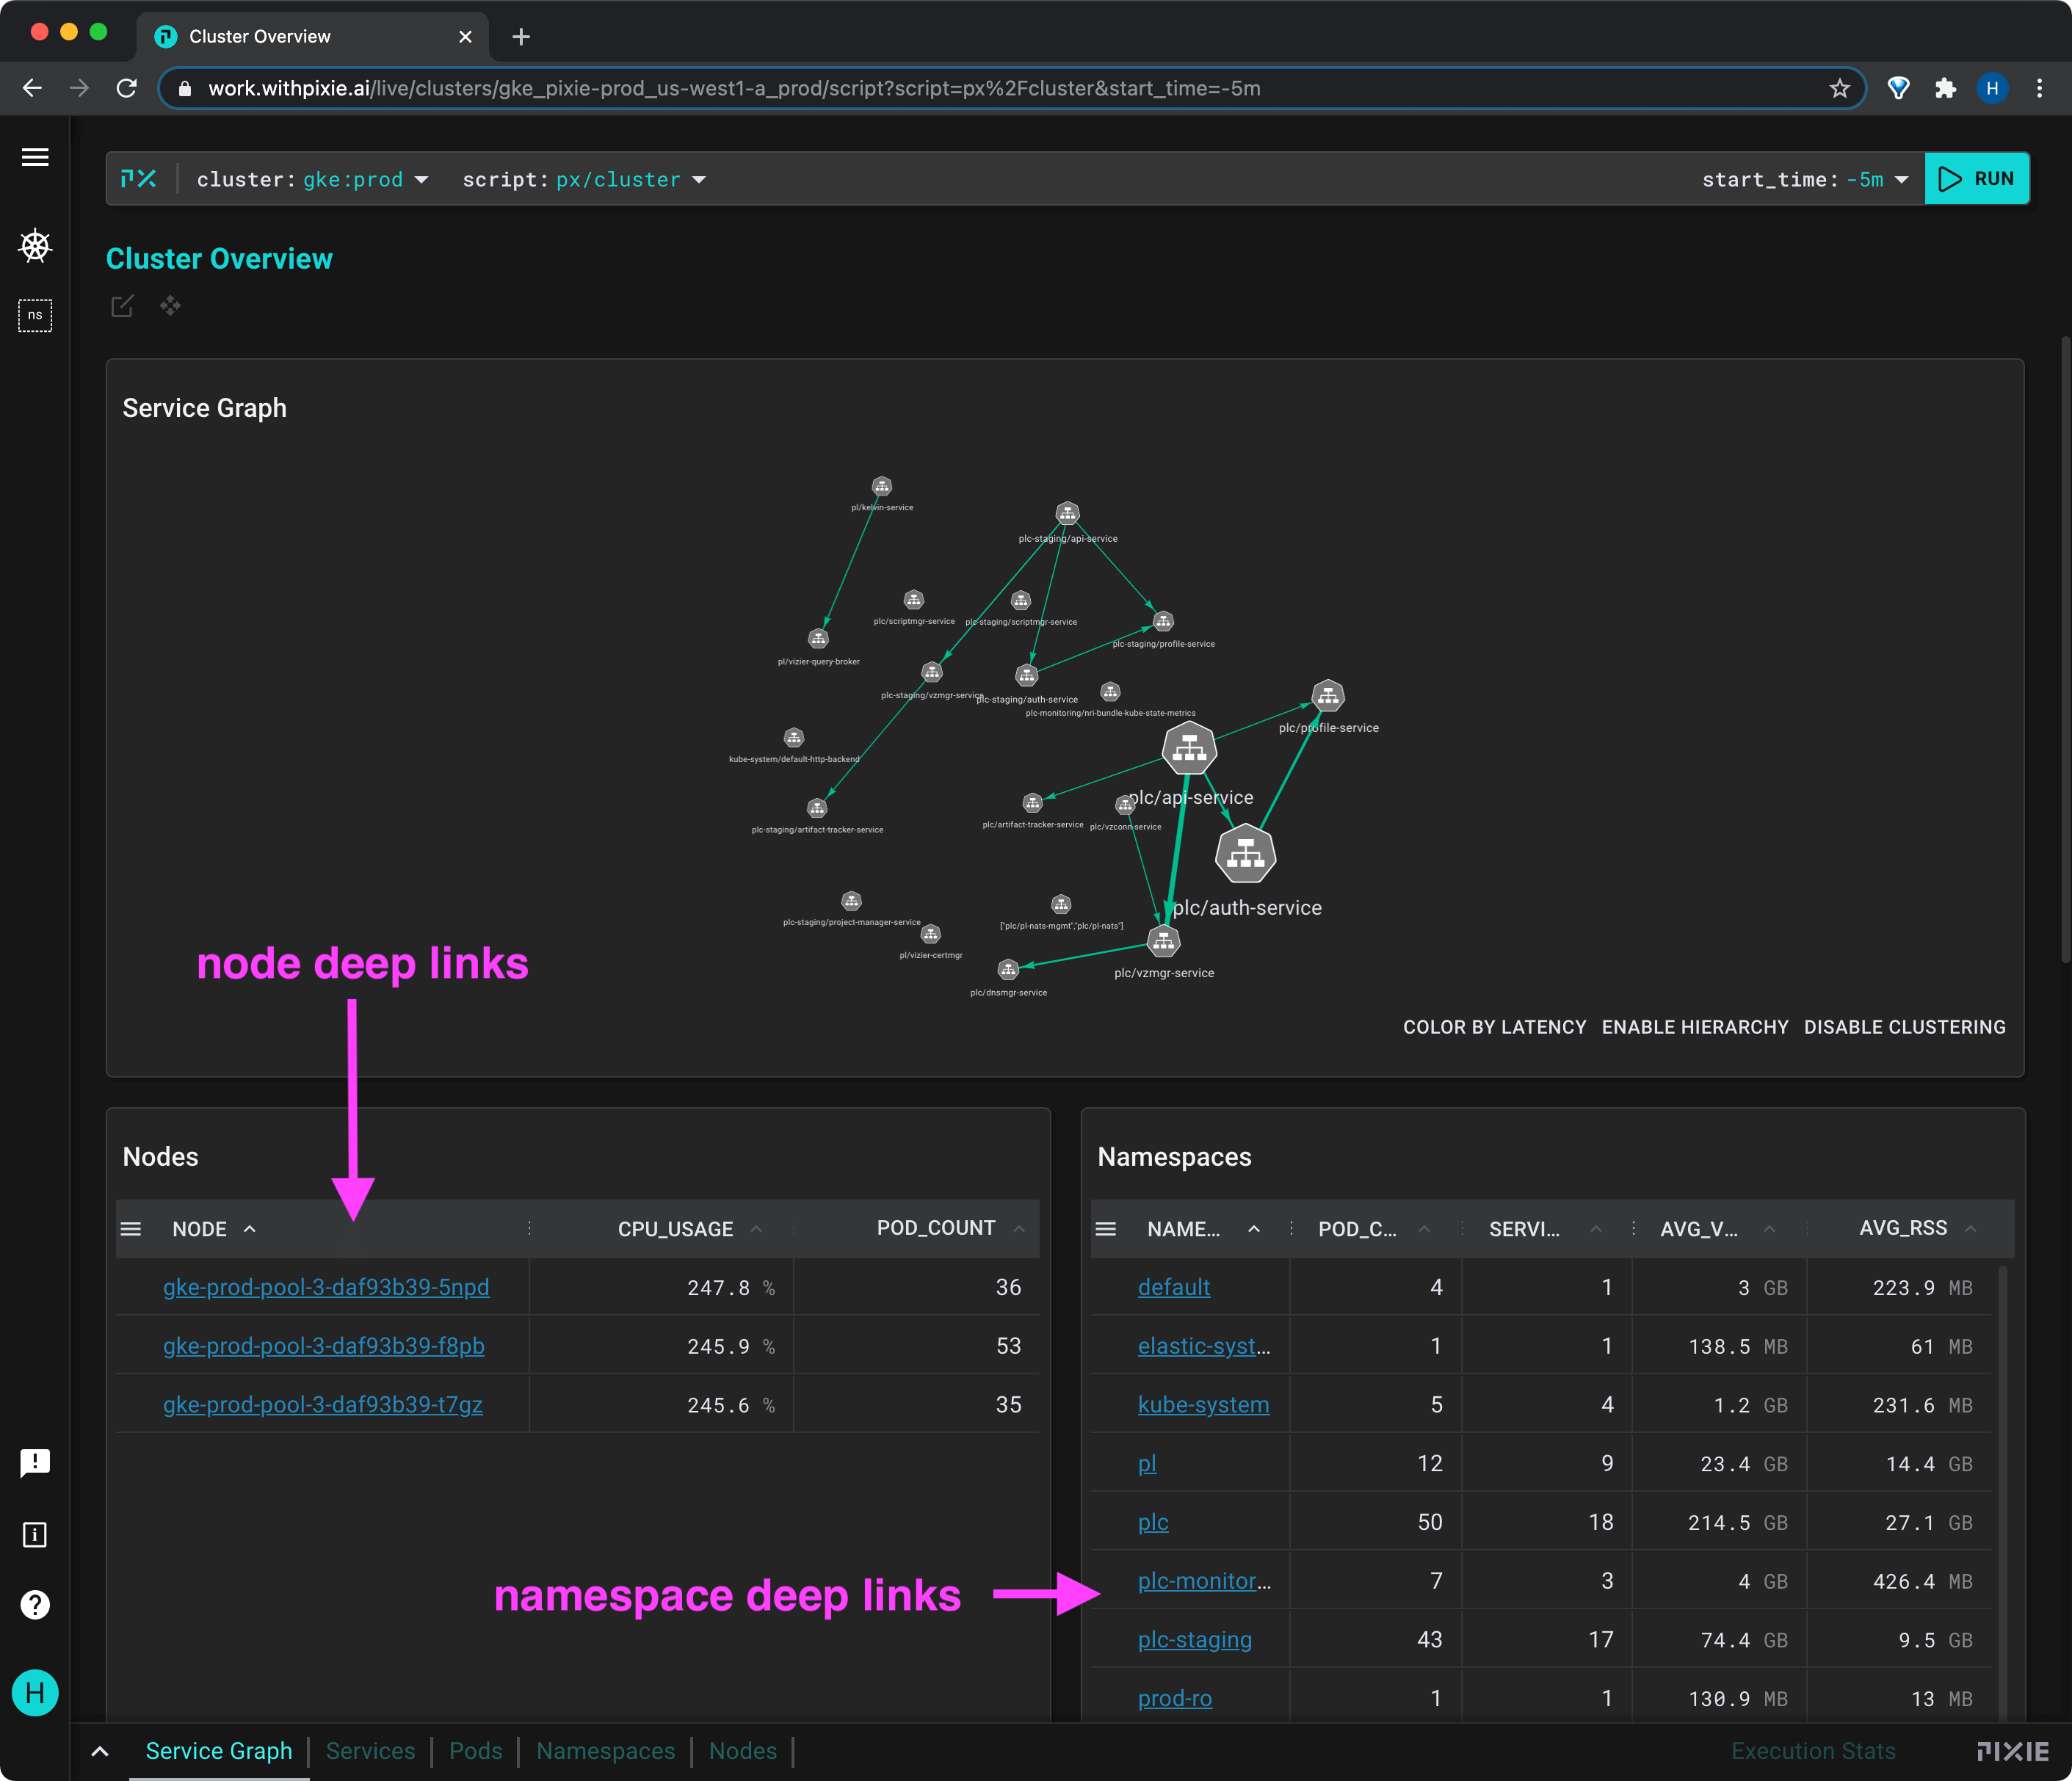
Deep Linking
Deep links embedded in the script output allow you to easily navigate between Kubernetes entities.
The "Nodes" table in the px/cluster script output lists all of the nodes in your cluster.
Click on any of the node names in the blue underlined text to be taken to the output of the px/node script for that particular node.
Click on deep links to easily navigate between Kubernetes entities.
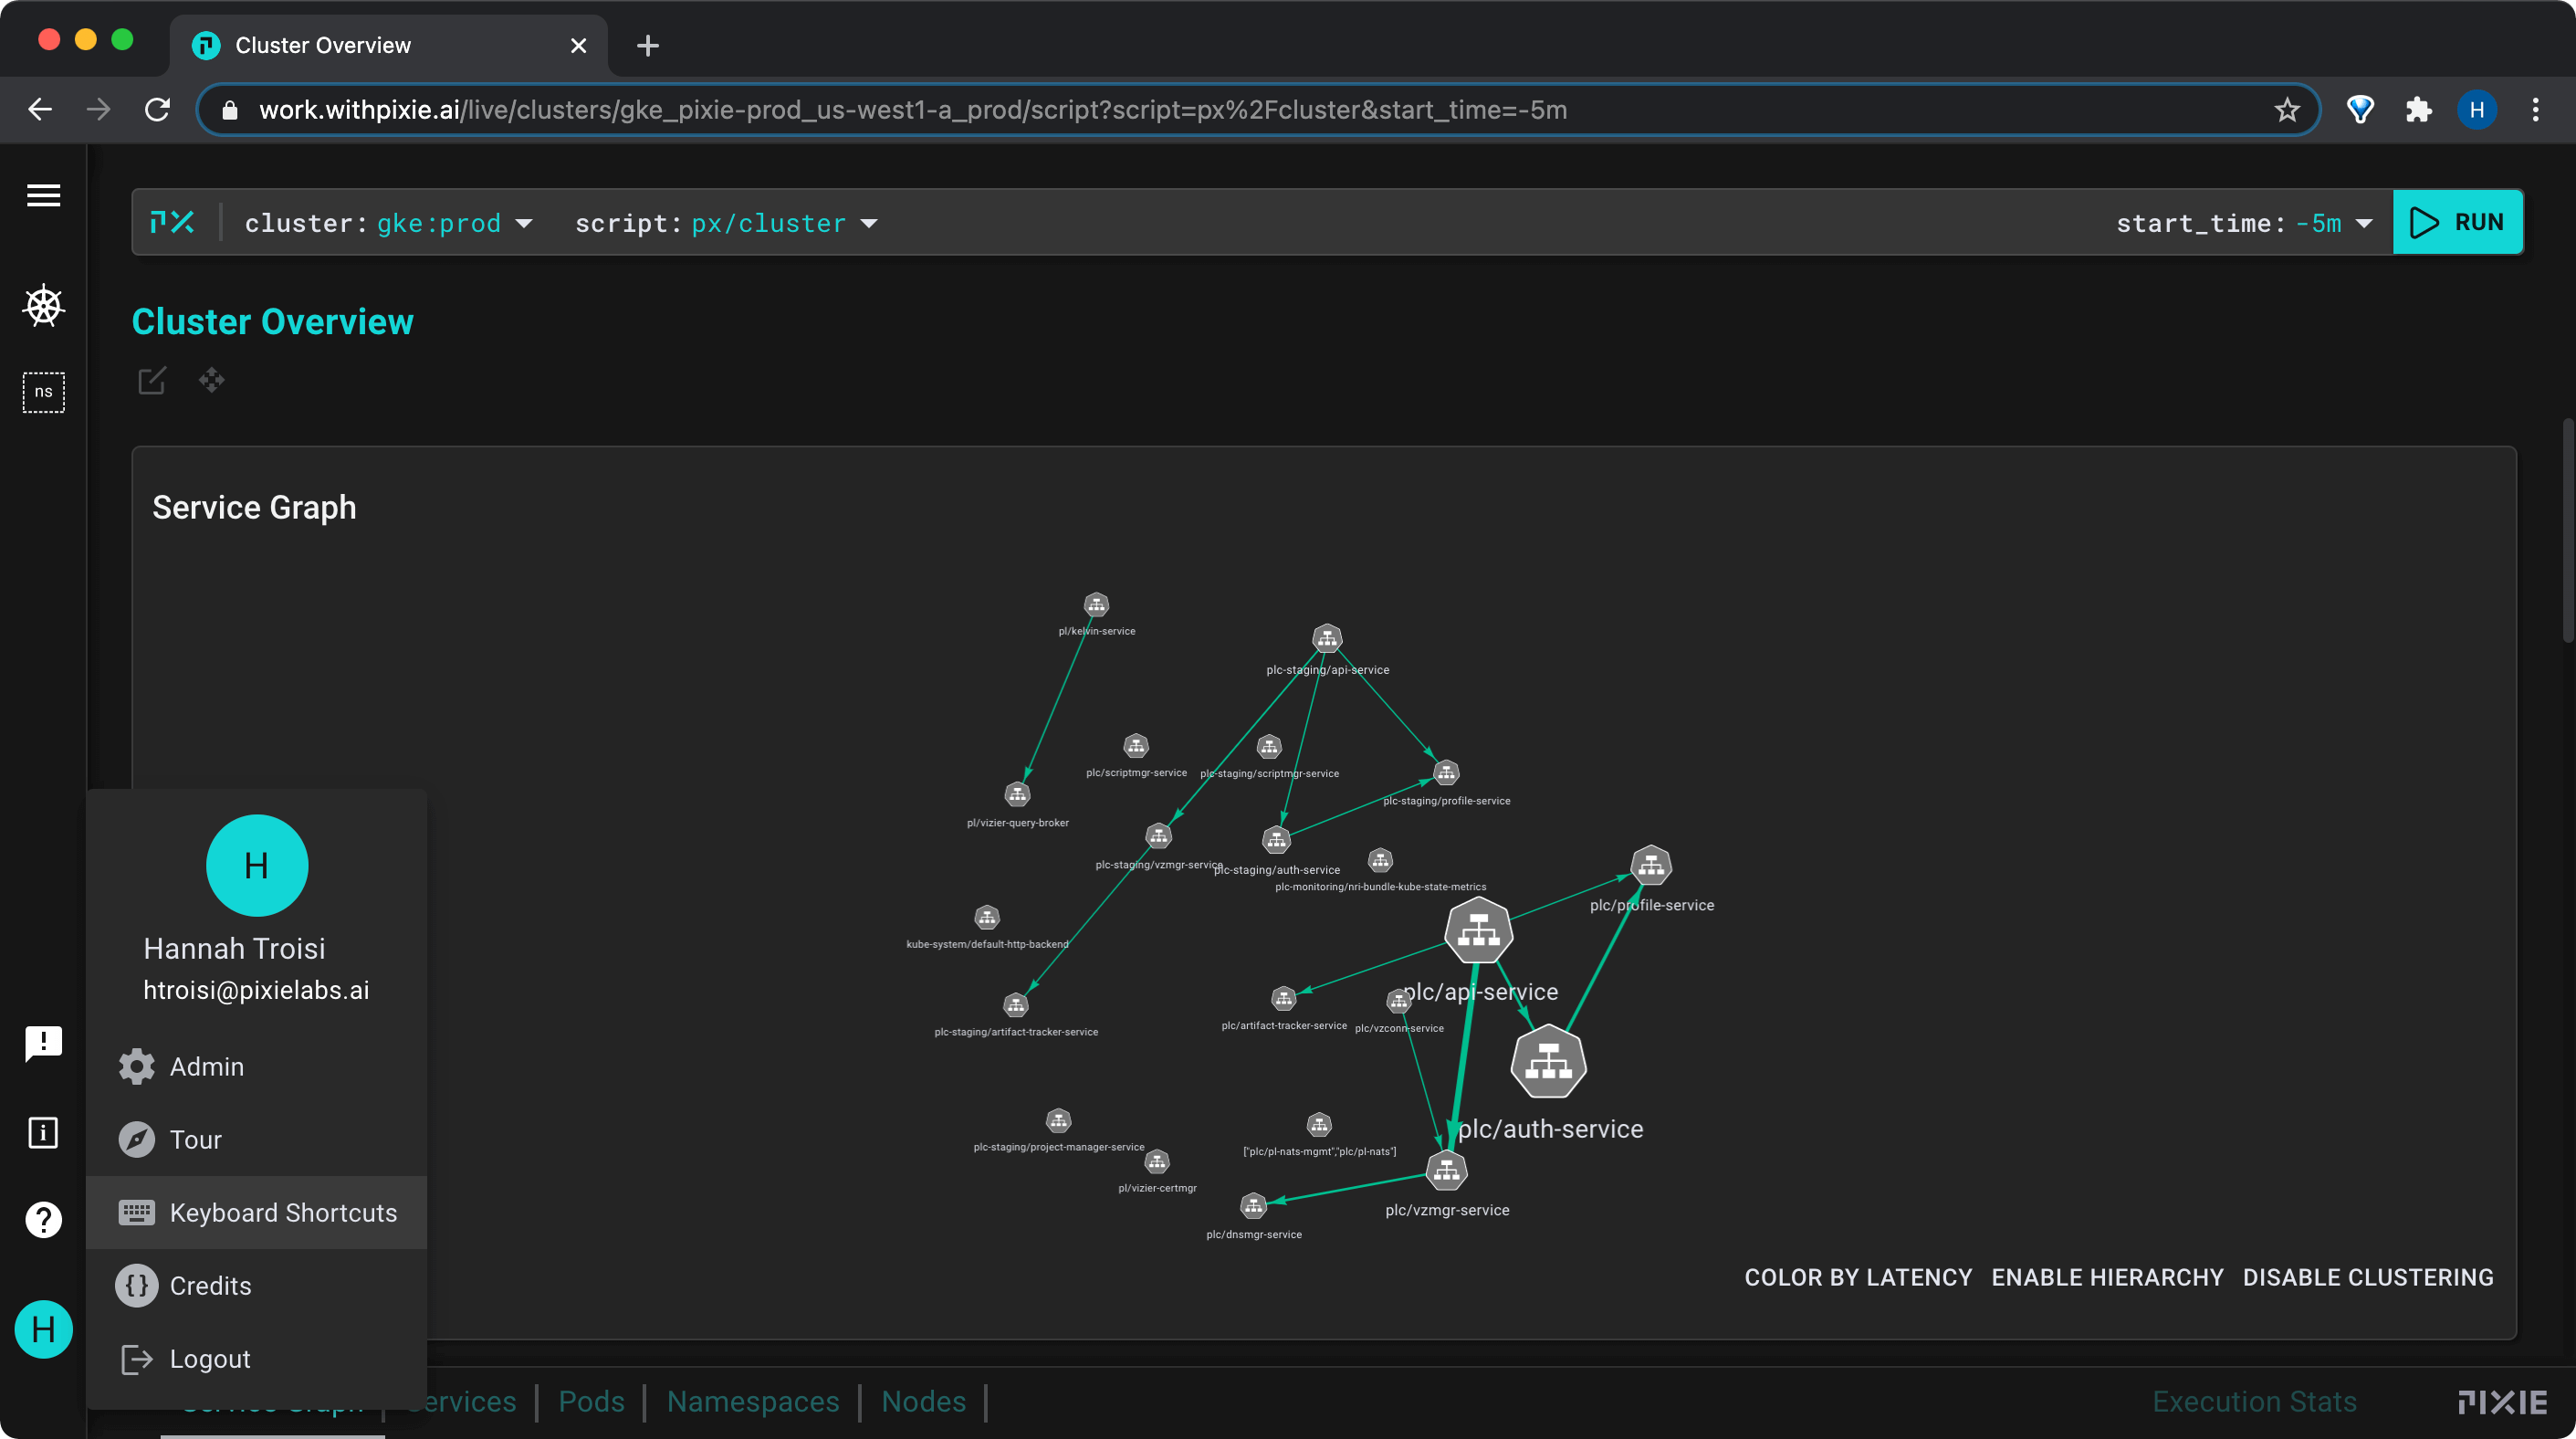
Keyboard Shortcuts
Navigating the Live UI is much faster using keyboard shortcuts. To see the shortcut menu, press shift+? or open the menu item (shown below).
Opening the Live UI shortcuts menu.
Try out the following 2 shortcuts, we'll use them often.
Run the current script: ctrl+enter (Windows, Linux) or cmd+enter (Mac)
Show / hide the script editor: ctrl+e (Windows, Linux) or cmd+e (Mac)
Pixie's Open Source Scripts
The Live UI's script drop-down menu lists all of Pixie's open source scripts.
To learn how to use Pixie scripts for a specific use case, check out one of the following tutorials:
Live views in the Live UI are constructed from two files:
The PxL Script queries the Pixie platform for telemetry data.
The Vis Spec describes how to visualize the query output.
To learn how to write your own PxL script, check out the tutorial. When writing custom scripts, we recommend starting from an existing script which does something similar to the result you are looking for.
Edit an Existing Script
To edit an existing PxL script in the Live UI:
Select the script you want to edit from the script drop-down menu in the top left.
Open the script editor using the keyboard shortcut: ctrl+e (Windows, Linux) or cmd+e (Mac).
Make edits in the PxL script and/or the Vis Spec tabs.
Run the script using the RUN button in the top right or by using the keyboard shortcut: ctrl+enter (Windows, Linux) or cmd+enter (Mac).
Hide the script editor using ctrl+e (Windows, Linux) or cmd+e (Mac).
Use the Scratch Pad
Use the Scratch Pad to:
Develop quick, one-off scripts.
Run example scripts from the pixie-demos repository.
Select the Scratch Pad (first item) from the script drop-down menu. The script editor should automatically open.
Copy the .pxl file into the script editor's PxL Script tab.
Copy the vis.json file into the script editor's Vis Spec tab.
Run the script using the RUN button in the top right or using the keyboard shortcut: ctrl+enter (Windows, Linux) or cmd+enter (Mac).
Show / hide the script editor using the ctrl+e (Windows, Linux) or cmd+e (Mac). Alternatively, use the Open editor button in the top right.
Pixie's Live UI will soon support script persistence, but at the moment, any scripts modified in the Live UI will be lost if you refresh or switch to a different script. For extensive script development, we recommend using the Script Developer Environment